Building an energy-efficient home isn’t just about saving on utility bills – it’s about creating a more comfortable, healthier living space while reducing energy use. By combining smart design, better materials, and efficient systems, you can cut energy consumption by 30–50% compared to standard homes. Here’s a quick overview of the key strategies:
- Super-Insulation: Reduce heating and cooling costs by up to 60% with better insulation and airtight construction.
- High-Performance Windows: Save 20–30% on energy use by upgrading to low-emissivity, triple-pane windows.
- Simple Design: Streamlined layouts reduce thermal bridging and material waste.
- Passive Solar Design: Position windows and thermal mass to naturally heat and cool your home.
- Advanced Framing: Use fewer materials and improve insulation with optimized framing techniques.
- Ventilation Systems: Heat and moisture recovery ventilators improve air quality and energy efficiency.
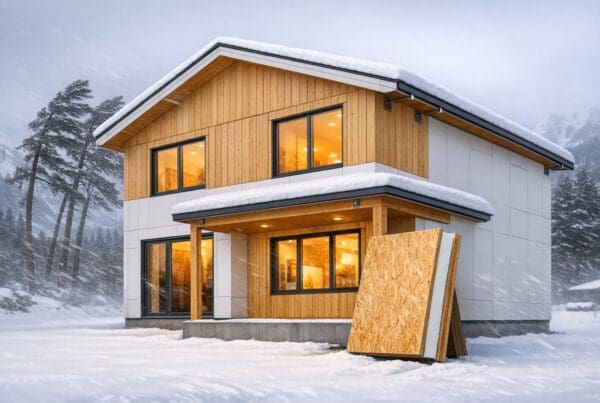
- Efficient Materials: Structural Insulated Panels (SIPs) and other advanced materials minimize energy loss.
- Air Sealing: Prevent leaks to cut energy waste by up to 30%.
- Efficient Systems: Install Energy Star-rated appliances, LED lighting, and right-sized HVAC systems.
- Renewable Energy: Solar panels and passive cooling strategies reduce reliance on fossil fuels.
These strategies work together as part of a whole-house systems approach, ensuring your home uses less energy while staying comfortable year-round. Whether you’re planning a new build or upgrading an existing home, these tips will help you save money and create a better living environment.

Energy-Efficient Home Building: 10 Essential Strategies with Savings Potential
1. Improve Your Building Envelope with Super-Insulation
Energy Performance Improvement
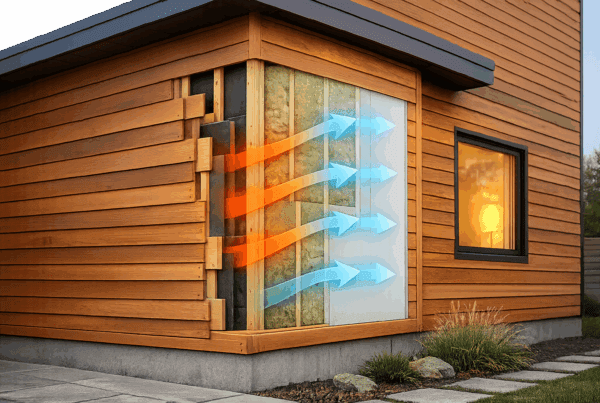
Super-insulation upgrades your home’s building envelope by addressing energy-draining weak spots. In traditional stick-built walls, thermal bridging – where heat escapes through studs and framing – limits energy efficiency. For instance, a typical 2×4 stick-built wall has an R-value of less than 10, while a 4.5-inch SIP wall achieves a whole-wall R-value of 14 [6].
Airtightness is another game-changer. SIPs are 15 times more airtight than conventional stick-built walls [6]. This matters because air leakage can account for up to 40% of heat loss [6], significantly impacting heating and cooling costs [5]. By reducing air leakage, super-insulation can slash heating and cooling expenses by as much as 60% compared to standard construction [7]. Considering that heating and cooling systems make up 48% of the average home’s energy use [5], this improvement addresses a major expense, leading to lower energy bills and long-term savings.
Cost-Effectiveness for Homeowners
While super-insulation may come with a higher initial cost, it pays off by enabling smaller, more efficient HVAC systems [5][7]. Build-in-place systems, like EZ SIPS, offer an affordable alternative to factory-precut SIPs, delivering R-28+ performance at less than half the cost [8].
The savings add up over time. For example, a 6.5-inch SIP wall provides an R-value of 22 or more, whereas a 2×6 stud-framed wall with R-20 fiberglass batts delivers an effective R-value of only 16.8 [7]. This difference translates into lower utility bills month after month, making super-insulation a smart long-term investment.
Ease of Implementation in Residential Construction
Modern super-insulation systems are designed to work seamlessly with standard construction techniques. Build-in-place panels can be installed within standard 2×6 framing on-site, eliminating the need for cranes or specialized tools [8]. Standard framing crews can achieve SIP-level performance using familiar materials and foam inserts.
"I think the first benefit is the speed at which you can assemble them… When they arrive at the job site, they’re easier to assemble." – Stephen Munn, General Manager, Insulspan [7]
For added convenience, select systems with pre-cut channels for electrical and plumbing work, avoiding the hassle of cutting through foam on-site [8]. To ensure a continuous thermal barrier, apply 1¾-inch thick foam sheets over solid wood areas like headers and king studs [8]. These practical steps make super-insulation a straightforward upgrade for residential projects.
sbb-itb-1086e16
2. Install High-Performance Windows and Position Them Correctly
Energy Performance Improvement
Did you know that windows account for a whopping 25%–30% of your home’s heating and cooling energy use? That makes them a prime target for improving energy efficiency [9]. Upgrading to high-performance windows, such as those with a U-factor between 0.15 and 0.30, or triple-pane options, can improve thermal performance by 20%–30% [10].
Several features make these windows stand out. Low-emissivity (Low-E) coatings reflect infrared heat while allowing natural light to pass through, keeping your home comfortable without sacrificing brightness. Inert gas fills, like Argon and Krypton, provide extra insulation between panes, improving efficiency by 6% and 27%, respectively [10]. Frame materials also matter – fiberglass and insulated vinyl frames outperform aluminum, which tends to conduct heat more easily. For even better results, casement and awning windows use compression seals that tighten against wind pressure, cutting down on air leakage and preventing 10%–20% efficiency losses [10].
Cost-Effectiveness for Homeowners
Switching to high-performance windows isn’t just about saving energy – it’s also a smart financial move. While standard windows cost around $400–$800 per unit, high-performance models range from $800–$1,500, with payback periods of 8–12 years in northern climates and 10–15 years in southern areas [10]. Over time, the energy savings can more than make up for the initial cost.
And here’s the good news: you can take advantage of federal tax credits to offset these costs. Through 2032, homeowners can claim 30% of the cost (up to $600 annually) for ENERGY STAR Most Efficient windows [10]. Strategic window placement can further boost savings. For example, south-facing windows capture passive solar heat during winter, while east-facing windows brighten your mornings without adding too much heat later in the day. Adding exterior shading to west-facing windows can cut air conditioning costs by 15% to 50% [5].
Ease of Implementation in Residential Construction
Choosing the right windows starts with knowing your climate zone. In colder regions, focus on windows with a U-factor of 0.22 or lower. In warmer climates, prioritize those with a Solar Heat Gain Coefficient (SHGC) of 0.23 or less [10]. Always check for ENERGY STAR and NFRC ratings to ensure quality [9][10], and hire professionals for installation to maintain their performance.
Don’t forget about maintenance! Inspect seals and weatherstripping annually to prevent leaks, and keep weep holes clear to avoid water damage [10]. When paired with proper insulation, energy-efficient windows can significantly enhance your home’s overall energy performance.
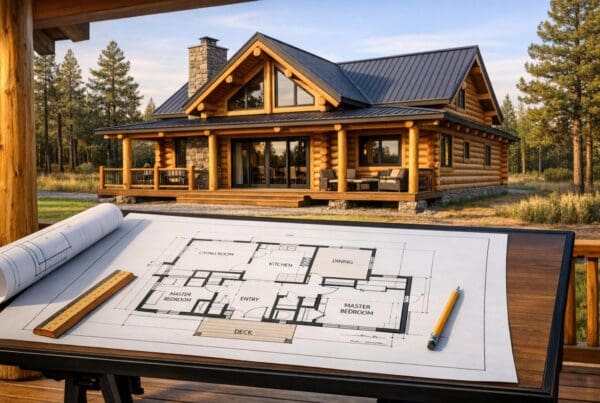
3. Keep Your Building Design Simple
Energy Performance Improvement
A simple building design is a game-changer for energy efficiency. Why? Because it makes it much easier to create a tightly sealed, well-insulated building envelope – one of the most effective ways to improve energy performance [4]. On the flip side, complex designs with too many corners and rooflines increase the risk of thermal bridging, where heat sneaks out through structural components [4][5].
Take advanced house framing, for example – also called optimum value engineering. This method simplifies the structure to use less lumber while improving energy efficiency by allowing for more insulation [1][5]. As the U.S. Department of Energy explains:
"Advanced house framing… reduces lumber use and waste and improves energy efficiency in a wood-framed house" [1].
The result? Better energy performance that’s also easier on your wallet.
Cost-Effectiveness for Homeowners
Simplicity doesn’t just boost energy efficiency – it also saves money. Simple designs cut costs in two big ways: lower construction expenses and reduced ongoing energy bills. Using a whole-building system approach, your home is treated as a fully integrated energy system. This reduces material use and ensures all components work together efficiently [5].
A well-designed building envelope can also shrink the size – and cost – of your heating and cooling systems. Considering that HVAC systems account for about 48% of a home’s energy use [5], this can lead to immediate savings on equipment and long-term reductions in utility bills. By incorporating energy modeling during the design phase, you can strike the perfect balance between performance and construction costs [4].
Sustainability and Environmental Impact
Simple designs don’t just save money – they’re better for the planet, too. By reducing lumber use and construction waste, they naturally support eco-friendly building practices. Plus, straightforward designs make it easier to take advantage of passive solar benefits, like orienting your home to maximize sunlight and minimize heating and cooling needs [1][5]. The Zero Energy Project underscores this point:
"Cost-effective zero net energy homes begin with smart design" [4].
A simpler design also ensures that builders and subcontractors can focus on essential energy-saving measures, like proper air sealing, during construction. This attention to detail helps deliver a home that’s not only efficient but also environmentally responsible [4].
4. Use Passive Solar Design and Proper Site Orientation
Energy Performance Improvement
Passive solar design is all about harnessing the sun’s natural energy to heat and cool your home, making it a key player in reducing energy use. A critical element here is proper orientation: positioning your home’s long axis east–west and aligning most windows to face true south (with a leeway of 10–15°) [13]. This setup maximizes sunlight during winter while keeping summer heat at bay. Homes designed with passive solar principles can cut heating demands by 30–60% compared to traditionally oriented buildings [13].
To achieve this, aim for south-facing windows to make up 7–12% of your home’s total conditioned floor area [13]. These windows allow sunlight to enter, which is then absorbed by thermal mass materials like concrete, brick, or stone. These materials store heat during the day and release it at night, keeping temperatures comfortable. However, it’s important to size the thermal mass correctly to match the glazing area [13].
Cost-Effectiveness for Homeowners
One of the best things about passive solar design is its cost-effectiveness – especially when incorporated during the planning stage. According to Energy.gov:
"Energy efficiency is the most cost-effective strategy for reducing heating and cooling bills" [12].
Retrofitting a home for passive solar features can end up costing three to five times more than integrating them during the initial design phase [13]. While materials like high-performance windows and thermal mass may increase upfront costs, they pay off by significantly lowering utility bills and stabilizing long-term expenses [14].
Orientation planning, on the other hand, adds virtually no cost when done early. For example, shading solutions like deciduous trees or exterior roller shades (priced at $200–$600 per window) can block harsh summer sun while still allowing winter sunlight to warm your home [13]. Plus, energy-efficient homes often fetch higher resale values, making them attractive to potential buyers [14].
Sustainability and Environmental Impact
Beyond saving money, passive solar design is one of the most environmentally friendly building strategies. It taps into the sun’s free and renewable energy instead of relying on fossil fuels. By reducing heating and cooling needs by up to 60%, it also lowers carbon emissions and shrinks your home’s environmental footprint [13].
This design approach creates an excellent foundation for integrating technologies like solar panels and air-source heat pumps, which work more efficiently when energy demands are reduced [14]. Additionally, natural ventilation techniques – like cross-ventilation and night purge ventilation – can further decrease or even eliminate the need for mechanical cooling in many areas [13].
Ease of Implementation in Residential Construction
Incorporating passive solar design is surprisingly straightforward if you follow a few essential steps. Start by placing your home on the north side of your lot to ensure unobstructed solar access between 9 a.m. and 3 p.m. [12]. Use tools like sun-tracking apps or solar noon observations to pinpoint true south [13].
When it comes to windows, allocate 60–80% of the total glazing area to the south side, keep north-facing windows under 4%, and minimize west-facing glazing to avoid afternoon heat buildup [13]. Opt for high-performance windows on the south side with a Solar Heat Gain Coefficient of at least 0.40 and low U-factors (0.20–0.30) to prevent heat loss [13].
Lastly, avoid covering thermal mass surfaces with rugs or furniture, as these materials need direct sunlight to store and release heat effectively [13]. While these principles are easy to grasp, professional energy modeling can help fine-tune your home’s design to prevent overheating and maximize overall efficiency [12][14]. By combining thoughtful orientation with thermal mass, passive solar design becomes a cornerstone of an energy-efficient home.
5. Apply Advanced House Framing Methods
Energy Performance Improvement
Advanced house framing, also known as Optimum Value Engineering (OVE), spaces studs 24 inches apart and uses 2×6 lumber. This approach reduces the amount of non-insulating wood in walls and cuts down on thermal bridging, which improves wall R-values. By lowering the framing factor – the percentage of the wall made up of wood – from around 25% to 15%, overall thermal resistance can increase by as much as 75% [16].
For even better results, Structural Insulated Panels (SIPs) are a solid option. These panels nearly eliminate thermal bridging. A 6.5-inch SIP wall can achieve an R-value of R-22 or more, compared to the effective R-value of 16.8 in a standard 2×6 stud-framed wall [7]. The airtight nature of SIPs can reduce heating and cooling costs by up to 5% annually [15]. When combined with other energy-efficient measures, total savings could reach as high as 60% [7].
These improvements don’t just enhance energy efficiency – they also save money during construction and over the home’s lifetime.
Cost-Effectiveness for Homeowners
Advanced framing methods can cut material costs by up to $1,000 and reduce labor expenses by 3% to 5%. SIPs, while initially more expensive than traditional framing, can simplify construction by eliminating the need for separate sheathing, insulation, and air sealing steps [15][7][8].
For those concerned about cost, build-in-place SIP systems offer a more affordable alternative, costing less than half of factory-prefabricated panels [8]. Over time, the superior insulation and airtightness of SIPs can lead to smaller, more efficient HVAC systems and lower utility bills.
Sustainability and Environmental Impact
Advanced framing reduces lumber use by 5% to 10% and cuts the number of wood pieces needed by 30%, which helps minimize construction waste and lowers the home’s carbon footprint [16]. SIP systems often use OSB sheathing, made from fast-growing trees and recycled wood chips that might otherwise go to waste. Additionally, reducing thermal bridging and air leakage – which can account for up to 40% of heat loss in traditional homes [6] – not only saves energy but also improves indoor air quality by allowing for better control and filtration of fresh air.
Ease of Implementation in Residential Construction
Advanced framing integrates seamlessly into energy-efficient construction strategies. To get started, design homes on two-foot modules, use two-stud corners, right-size headers, and opt for single top plates wherever possible. It’s also a good idea to consult local building officials early in the process to ensure compliance with wind and seismic codes [15][16].
For those exploring SIPs, partnering with an experienced contractor is key. Stephen Munn, General Manager at Insulspan, points out:
"Energy codes are getting more and more stringent … but SIPs already meet those much stricter air-tightness requirements" [7].
If you’re working with existing home plans, converting them to an advanced framing design typically costs between $1,000 and $1,500. However, the long-term savings in materials, labor, and energy make it a smart investment [16].
6. Add Heat and Moisture Recovery Ventilation
Energy Performance Improvement
Heat Recovery Ventilators (HRVs) and Energy Recovery Ventilators (ERVs) are designed to transfer energy from conditioned indoor air to fresh outdoor air, easing the workload on your HVAC system while maintaining good indoor air quality. HRVs are particularly effective in cold, dry climates like the Upper Midwest because they remove excess moisture from high-humidity areas (e.g., kitchens and bathrooms) while preheating incoming air. ERVs, on the other hand, not only transfer heat but also manage moisture levels, making them ideal for humid regions like the Gulf Coast or Pacific Northwest [17].
By regulating airflow mechanically, these ventilators recover energy that would otherwise be lost. This allows for the use of smaller, more efficient HVAC systems that operate steadily without frequent cycling.
Cost-Effectiveness for Homeowners
Mechanical ventilation systems can cut energy use and carbon emissions by 40% to 60% [17], which translates to noticeable savings on utility bills over time. Additionally, controlled air exchange ensures that HVAC systems are optimally sized, improving their efficiency and reducing maintenance needs.
The Structural Insulated Panel Association (SIPA) highlights the risks of oversized HVAC systems:
"An oversized HVAC system will fail to reach the steady operating rate the equipment was designed for. Short cycling HVAC equipment will be less energy efficient and require more maintenance than properly sized HVAC equipment" [17].
Beyond energy savings, these systems help control humidity, reducing the risk of mold and mildew. This not only protects your home from costly repairs but also minimizes builder call-backs and ongoing maintenance issues [17].
Sustainability and Environmental Impact
Mechanical heat and moisture recovery is essential for creating sustainable, energy-efficient homes. Homes built with Structural Insulated Panels (SIPs) are up to 15 times more airtight than those built with traditional stick framing and fiberglass insulation, making mechanical ventilation a necessity [17]. These systems also support achieving Net Zero or "Positive Energy" goals, where homes generate more renewable energy than they use [17].
In addition to energy efficiency, recovery ventilators improve indoor air quality by filtering out pollutants, wildfire smoke, and other harmful particles. This not only benefits your family’s health but also contributes to a cleaner environment [17].
Ease of Implementation in Residential Construction
| Feature | Heat Recovery Ventilator (HRV) | Energy Recovery Ventilator (ERV) |
|---|---|---|
| Primary Function | Transfers heat between air streams | Transfers both heat and moisture |
| Best Climate | Cold, dry climates (e.g., Upper Midwest) | High-humidity climates (e.g., Gulf Coast) |
| Moisture Management | Expels indoor moisture | Reduces incoming outdoor humidity |
Selecting the right system depends on your climate. Avoid exhaust-only systems in airtight homes since they rely on uncontrolled air infiltration, which can create negative indoor air pressure [17]. Collaborate with a mechanical engineer to size both your ventilation and HVAC systems correctly, ensuring optimal performance and avoiding the drawbacks of oversized equipment.
This approach pairs well with other energy-saving techniques, setting the stage for selecting efficient materials and systems in the next section.
7. Choose Energy-Efficient Building Materials and Systems
Energy Performance Improvement
The materials you choose for your home’s construction play a big role in how much energy you’ll need for heating and cooling. Structural Insulated Panels (SIPs) are a great example of this. Unlike traditional stick-built homes, where wooden studs spaced every 16 to 24 inches create gaps (thermal bridges) that allow heat to escape, SIPs provide continuous insulation, effectively eliminating these energy leaks.
Thermal bridging is a major cause of energy loss, and SIPs help tackle this issue head-on. They deliver uninterrupted insulation, significantly improving whole-wall R-values. In fact, SIPs can outperform traditional stick framing by 40% to 60% in energy efficiency for walls of the same thickness [7]. The foam cores used in SIPs, such as EPS (Expanded Polystyrene) and GPS (Graphite Polystyrene), are particularly effective, offering double the thermal efficiency of fiberglass insulation of equal thickness [8].
Cost-Effectiveness for Homeowners
SIPs aren’t just about better performance – they can also save you money in the long run. Homes built with SIPs can cut heating and cooling costs by up to 60% compared to conventional construction materials [7]. While the initial cost of SIPs might be higher than traditional framing, these costs are often offset by faster installation times. Pre-cut panels come with pre-designed openings, which speeds up construction, reduces labor costs, and minimizes waste [6][7].
As Stephen Munn points out, "Energy codes are getting more and more stringent … but SIPs already meet those much stricter air-tightness requirements" [7]. This means that homes built with SIPs today are already prepared for future building standards, saving homeowners from costly retrofits later on.
Sustainability and Environmental Impact
SIPs also shine when it comes to sustainability. Their OSB (Oriented Strand Board) components are made from fast-growing trees or recycled wood chips, which helps reduce environmental waste [7]. The airtight construction of SIPs minimizes energy loss, leading to lower energy use and reduced carbon emissions over the lifespan of the home.
Additionally, SIPs with EPS or GPS cores don’t release harmful chemicals, provided proper mechanical ventilation is used. This makes them a healthier option for indoor air quality [7]. Their resistance to mold and mildew also ensures long-term durability and reduces maintenance needs [8]. All of these factors make SIPs an environmentally friendly choice for modern construction.
Ease of Implementation in Residential Construction
On top of their performance and sustainability benefits, SIPs are relatively easy to work with. Weighing less than four pounds per square foot, they’re light enough to be installed manually in many residential projects without the need for heavy machinery [7]. Despite their lightweight nature, SIPs are incredibly strong – two to three times stronger than traditional stick-frame construction thanks to their dual-sided sheathing [7]. This strength allows for creative architectural designs, such as open floor plans and cathedral ceilings, without compromising the building’s energy performance.
Another bonus of SIPs is their solid foam core, which offers an unexpected benefit.
"Because they have the solid core, many people comment that they feel the SIP provides a much quieter living experience than in a traditionally insulated home", says Stephen Munn [7].
This soundproofing quality adds to the comfort of a home, creating a quieter, more serene indoor environment compared to homes insulated with traditional fiberglass batts.
8. Reduce Air Leakage with Complete Air Sealing
Energy Performance Improvement
Proper air sealing not only cuts down on energy waste but also boosts the efficiency of your insulation and HVAC systems. Air leaks can increase heating and cooling expenses by over 30% [18][20]. When gaps in your home let conditioned air escape, outdoor air sneaks in, forcing your HVAC system to work overtime.
This issue is amplified by the stack effect, where warm air rises and escapes through openings at the top of the home, pulling in cold air from below [21]. With nearly a mile of exterior walls in a typical home, there are plenty of opportunities for air to leak [21][22]. Sealing these gaps can significantly improve energy efficiency.
To tackle air leakage effectively, focus on sealing high-impact areas. For example, sealing the top plate to attic drywall can reduce air leakage by up to 1.6 air changes per hour at 50 Pascals (ACH50), while addressing band joists can achieve a 0.4 ACH50 reduction [21][22]. Even smaller fixes, such as sealing gaps around recessed lights, duct boots, and garages, can make a noticeable difference [21][22].
Cost-Effectiveness for Homeowners
Air sealing is one of the most cost-effective upgrades you can make. Materials like caulk and weatherstripping often pay for themselves within a year through lower utility bills [19]. Sealing house wrap joints with the right tape can even boost the material’s performance by 20%, offering a simple and affordable way to enhance your home’s efficiency [18][20].
Beyond cutting energy bills, effective air sealing enables you to install a smaller, more efficient HVAC system. A home that maintains steady temperatures without constant air loss doesn’t require oversized equipment, saving you money on initial installation and long-term maintenance.
Ease of Implementation in Residential Construction
Air sealing is straightforward and doesn’t usually require advanced skills. Use caulk for stationary parts like window and door frames, and apply weatherstripping for moving components like operable windows and doors [19]. For gaps around plumbing, wiring, and ducts, low-expansion spray foam works well.
Certain areas need extra care. Around chimneys, furnaces, and water heater vents, fire-resistant materials like sheet metal or furnace cement caulk are essential [19]. To prevent air leakage through electrical outlets and switch plates, install foam gaskets behind the cover plates. For fireplaces, keep the flue damper closed when not in use or use an inflatable chimney balloon to block air loss [19].
For a comprehensive approach, consider hiring an energy assessor to conduct a blower door test. This test pinpoints air leaks and verifies the effectiveness of your sealing efforts [19][21]. In fact, modern building codes, such as the 2012 and 2015 International Energy Conservation Code (IECC), now require blower door tests instead of visual inspections [21]. This ensures homes meet measurable airtightness standards, providing peace of mind and better energy performance.
9. Install High-Efficiency Appliances, Lighting, and HVAC Systems
Energy Performance Improvement
Once you’ve sealed your home’s building envelope, the next step is upgrading the systems that consume the most energy. High-efficiency appliances, lighting, and HVAC systems can drastically reduce energy use. Combined with a well-sealed home, these upgrades can cut energy consumption by 80-90% compared to standard construction practices, completing a comprehensive energy-saving strategy [24].
Here’s how these upgrades make a difference: LED lighting alone can lower electricity use by an average of 15%. Smart thermostats can trim heating and cooling costs by up to 15%, while Energy Star-rated appliances consume 10-50% less energy and water [3][23][25]. Heat pumps, which transfer heat instead of generating it, are especially efficient, delivering up to four times the energy they consume [25].
Cost-Effectiveness for Homeowners
Investing in energy-efficient systems doesn’t just save energy – it saves money too. Homeowners can see annual energy savings of 50-80% [24], which translates to lower utility bills and increased property value. Homes with energy-efficient features often sell for 3-10% more than comparable properties without these upgrades [24].
Modern buyers are increasingly aware of these benefits. For instance, 26% of millennials are willing to pay up to $4,999 more upfront for a home that offers $1,000 in annual utility savings [24]. On top of that, federal tax credits allow homeowners to claim up to $3,200 annually for energy-efficient home improvements [24]. Many utility companies also provide rebates for upgrading to efficient systems, helping to offset the initial costs. When shopping for appliances or systems, look for the Energy Star label to ensure they meet strict government efficiency standards [25].
Ease of Implementation in Residential Construction
The good news is many of these upgrades are simple to incorporate into your home. LED bulbs can be swapped into your existing fixtures, smart thermostats can replace standard models in less than an hour, and Energy Star appliances install just like their conventional counterparts.
For HVAC systems, proper sizing is critical. An oversized unit in an efficient home can lead to issues like short cycling, poor humidity control, and unnecessary wear and tear [24]. As for water heating – often the second-largest energy expense in a home – consider heat pump or tankless water heaters. Placing them close to where hot water is used can also reduce heat loss through pipes [3][4].
To keep everything running smoothly, schedule annual professional maintenance for your HVAC system and clean appliance components like refrigerator coils twice a year. These small steps ensure your home stays as energy-efficient as possible [23].
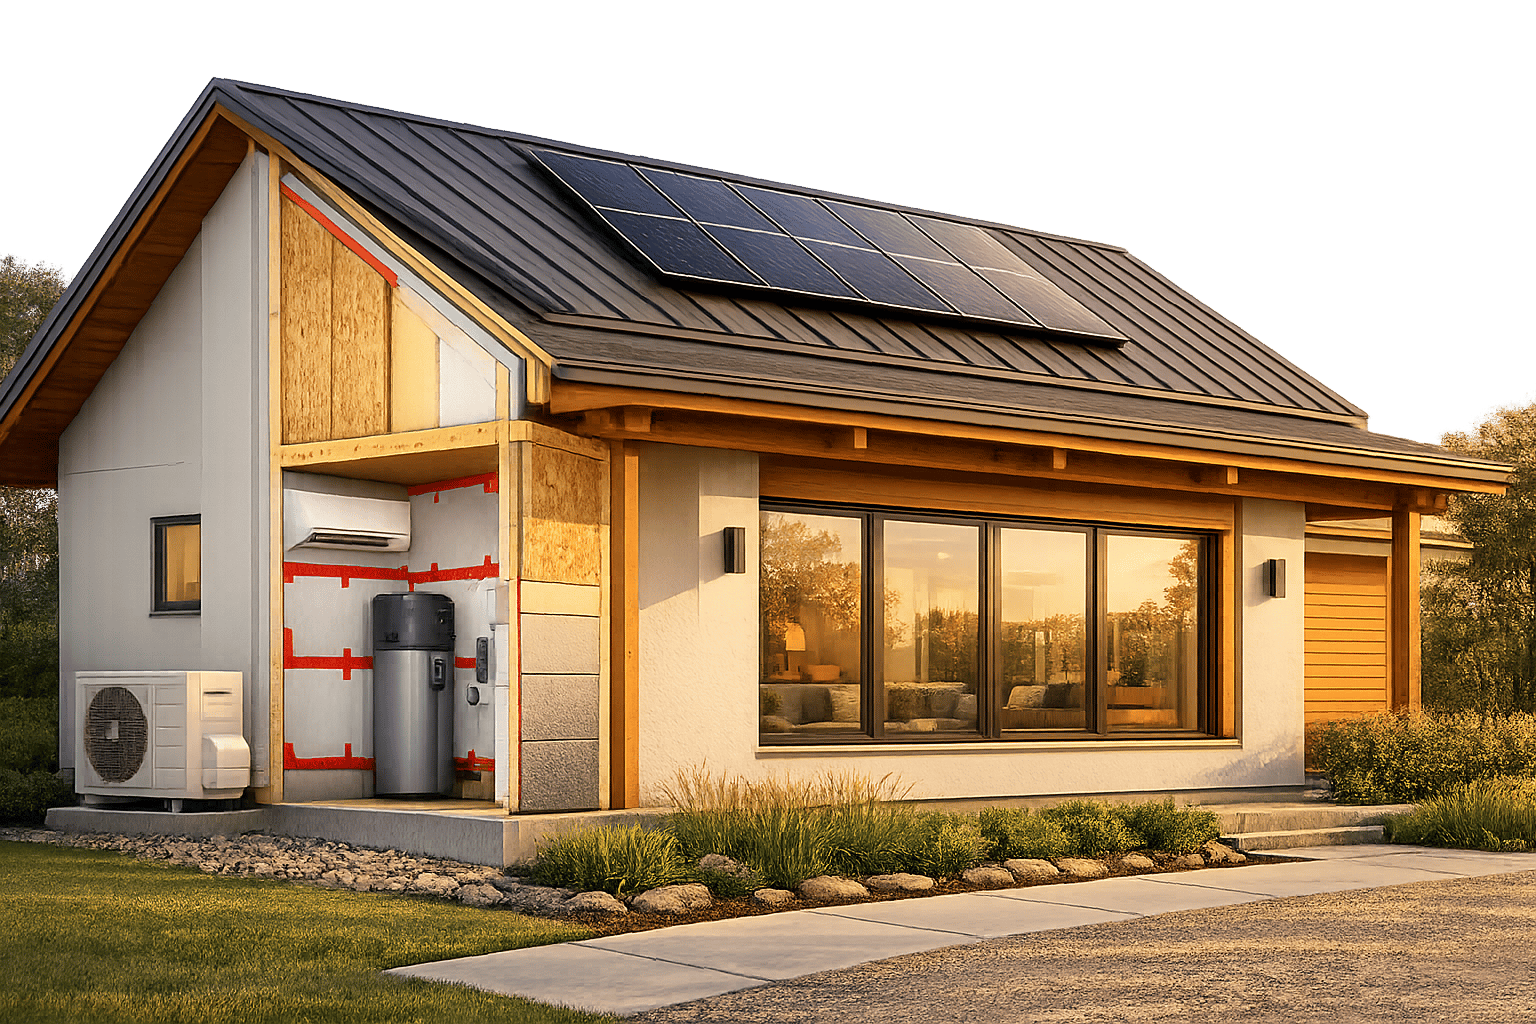
10. Add Renewable Energy and Passive Cooling Strategies
Energy Performance Improvement
Boost your home’s energy efficiency by combining clean energy systems with passive cooling methods. One of the most accessible options for homeowners is solar photovoltaic (PV) panels, which can generate enough power to run your entire home [4][5]. For those living in extreme climates, geothermal heat pumps are a game-changer. They leverage the earth’s stable underground temperatures (above 50°F) to provide highly efficient heating and cooling [25].
Passive cooling techniques can further cut down energy usage. Features like cool roofs and well-thought-out landscaping can slash air conditioning costs by 15% to 50%. Even simple adjustments, like orienting your home along a north-south axis, can help block harsh summer sun while making the most of winter sunlight [5]. Ceiling fans are another easy win – they create a wind-chill effect that keeps rooms comfortable and can save you $15 to $20 a year on energy bills [25]. Together, these strategies maximize efficiency and pair seamlessly with renewable energy systems.
Cost-Effectiveness for Homeowners
While renewable energy systems, such as solar PV panels, come with a high initial price tag [4], the long-term savings on utility bills make them a worthwhile investment. Adding battery storage systems lets you store excess solar energy for later use, offering flexibility and scalability [2]. Plus, with around 60% of millennial homebuyers prioritizing net-zero homes – homes that generate as much energy as they use – these upgrades can increase your property’s appeal and value [5]. Federal incentives and local rebates can further ease the financial burden of installation [11].
Sustainability and Environmental Impact
Combining renewable energy with passive cooling measures is a powerful way to reduce your home’s environmental footprint. Energy-efficient homes can cut energy consumption by 30% to 50% [2]. For instance, solar water heating reduces reliance on fossil fuels for daily energy needs, while landscaping with deciduous trees provides natural, seasonal shading [25]. In the summer, these trees block the sun, and in the winter, their bare branches allow sunlight to warm your home. This approach not only conserves resources but also works with nature to create a comfortable living environment for years to come.
Ease of Implementation in Residential Construction
Many of these renewable energy and passive cooling strategies are straightforward to integrate into new home construction. Solar panels can be installed on most roof types using standard mounting systems, and grid-tied systems only require an inverter to connect to your home’s electrical setup. Modern battery storage systems are increasingly user-friendly, plugging directly into your electrical panel [2].
Passive cooling methods are most effective when planned during the design phase. Roof overhangs, strategically placed windows, and proper home orientation can all be incorporated early on, avoiding the expense of retrofits [12]. For landscaping, plant fir trees on the north and west sides to act as windbreaks, and deciduous trees on the south and east sides for summer shade and winter sunlight [25]. Ceiling fans are another simple addition – set them to spin counterclockwise in summer for a cooling breeze, and clockwise in winter to circulate warm air from the ceiling [25]. These practical steps make energy efficiency both achievable and long-lasting.
How to Build a House That Uses 90% Less Energy!
Recommended Insulation R-Values by Climate Zone
Choosing the right insulation R-value is a key part of improving energy efficiency in your home. Here’s a breakdown of the recommended R-values based on climate zones to help guide your decisions.
To start, identify your climate zone. The U.S. is divided into eight climate zones, determined by Heating Degree Days (HDD) and Cooling Degree Days (CDD). These zones are assigned at the county level rather than by state, as factors like elevation and local geography can cause significant variations within a single state [26][28]. Proper insulation is a cornerstone of energy-efficient home designs, forming part of a whole-house approach.
The International Energy Conservation Code (IECC) 2021 sets the minimum R-value standards for residential construction [26][29]. According to the U.S. Department of Energy, upgrading from the IECC 2006 standards to those of 2021 can cut residential energy usage by about 30% [31]. Below is a table showing the minimum R-values recommended for different parts of a home across all climate zones:
| Climate Zone | Attic/Ceiling | Wood-Frame Wall (Cavity + Continuous) | Floor | Basement/Crawlspace Wall |
|---|---|---|---|---|
| Zone 1 | R-30 | R-13 | R-13 | R-0 |
| Zone 2 | R-38 | R-13 + R-5ci | R-13 | R-0 |
| Zone 3 | R-38 | R-20 or R-13 + R-5ci | R-19 | R-5/R-13 |
| Zone 4 | R-49 | R-20 + R-5ci or R-13 + R-10ci | R-19 | R-10/R-13 |
| Zone 5 | R-49 | R-20 + R-5ci or R-13 + R-10ci | R-30 | R-15/R-19 |
| Zone 6 | R-49 | R-20 + R-5ci or R-13 + R-10ci | R-30 | R-15/R-19 |
| Zone 7 & 8 | R-49 | R-20 + R-5ci or R-13 + R-10ci | R-38 | R-15/R-19 |
Source: 2021 IECC Table R402.1.2 [26][31]. Note: "ci" stands for continuous insulation.
To find your specific climate zone, you can use the DOE’s climate zone lookup tool at energycodes.gov. Experts often suggest going beyond the minimum requirements, especially in areas like the attic, where the cost-to-performance ratio is particularly favorable [26][27][31]. For example, in January 2024, a homeowner in Portland, Oregon upgraded attic insulation from R-19 to R-49. The project cost $1,800 in materials and took a single weekend to complete. This upgrade led to an annual gas bill reduction of $340, meaning the investment would pay for itself in under six years [27]. This example shows how even modest upgrades can lead to noticeable savings, highlighting the importance of efficient building practices.
Keep in mind, these R-values represent minimum code requirements. Exceeding these values can further enhance your home’s performance [26]. Pairing insulation upgrades with effective air sealing is critical, as air leaks can account for 25–40% of energy loss [27]. As the U.S. Department of Energy explains:
"Energy losses due to air leakage can be greater than the conductive losses in a well-insulated home" [30].
Conclusion
Each strategy outlined above plays a role in creating an energy-efficient home. While building such a home requires careful planning, the rewards are undeniable. By incorporating strategies like super-insulation, high-performance windows, passive solar design, and renewable energy systems, you’re setting the stage for lasting savings, improved comfort, and reduced environmental impact.
The financial upside is hard to ignore. Energy-efficient homes can reduce energy use by 30% to 50% compared to the average American home [2]. This means saving hundreds – or even thousands – of dollars annually. But it’s not just about cutting costs. These homes provide consistent indoor temperatures year-round, eliminating drafts and cold spots. Modern ventilation systems ensure a steady flow of fresh, filtered air, while also managing moisture to prevent mold and improve overall air quality [4][2][5].
The market reflects this growing demand for energy efficiency. In 2019, millennials made up 37% of new homebuyers, with energy efficiency ranking high on their list of priorities [5]. Nearly 60% of these buyers are drawn to net-zero homes – properties that produce as much energy as they consume [5]. High-performance homes are increasingly seen as premium assets, with appraisers, realtors, and insurance companies recognizing their added value. This means your investment could lead to a higher resale price down the line [2][5].
To get started, treat your home as an integrated system where every element – insulation, HVAC, windows – works together. Use energy modeling tools during the design phase to strike the right balance between performance and cost [4]. Explore federal, state, and local incentives to offset upfront expenses [11]. Most importantly, partner with a builder who specializes in high-performance construction and shares your energy goals. This approach ensures your home is optimized for both efficiency and long-term benefits.
Whether you’re building your forever home, a vacation getaway, or an investment property, the whole-house systems approach delivers durability, comfort, and performance [5]. By prioritizing quality materials and smart design, you’ll enjoy lower energy bills, cleaner air, and a reduced environmental footprint for years to come.
FAQs
What should I prioritize first for the biggest energy savings?
To maximize energy savings, focus on smart design choices like passive solar heating, airtight construction, and effective insulation. A tightly sealed, well-insulated building envelope is key to reducing heating and cooling demands. Incorporate passive solar elements such as south-facing windows and shading to naturally lower energy use. Planning these strategies early on can lead to substantial savings over time.
How do I choose the right insulation R-values for my climate zone?
To choose the right insulation R-values for your area, start by checking your local building codes and energy efficiency guidelines, as these will outline the minimum R-values required. In colder regions, you’ll generally need higher R-values, especially for walls, attics, and floors, to combat heat loss. For the best results, go beyond the minimum standards and consider a whole-house strategy. This approach ensures your insulation works in harmony with other elements of your home, helping you save energy and stay comfortable year-round.
Do I need an HRV or an ERV for my home?
Choosing between an HRV (Heat Recovery Ventilator) and an ERV (Energy Recovery Ventilator) comes down to your local climate, how your home is built, and what kind of ventilation you need.
- ERVs are ideal for warmer, humid areas since they help control moisture levels by reducing the amount of humidity entering your home.
- HRVs, on the other hand, are better suited for colder, drier climates because they focus on retaining heat while ventilating your space.
To make the right choice, weigh your region’s climate conditions and your indoor air quality priorities. It’s always a good idea to consult a professional to ensure you pick the best solution for your energy-efficient home.