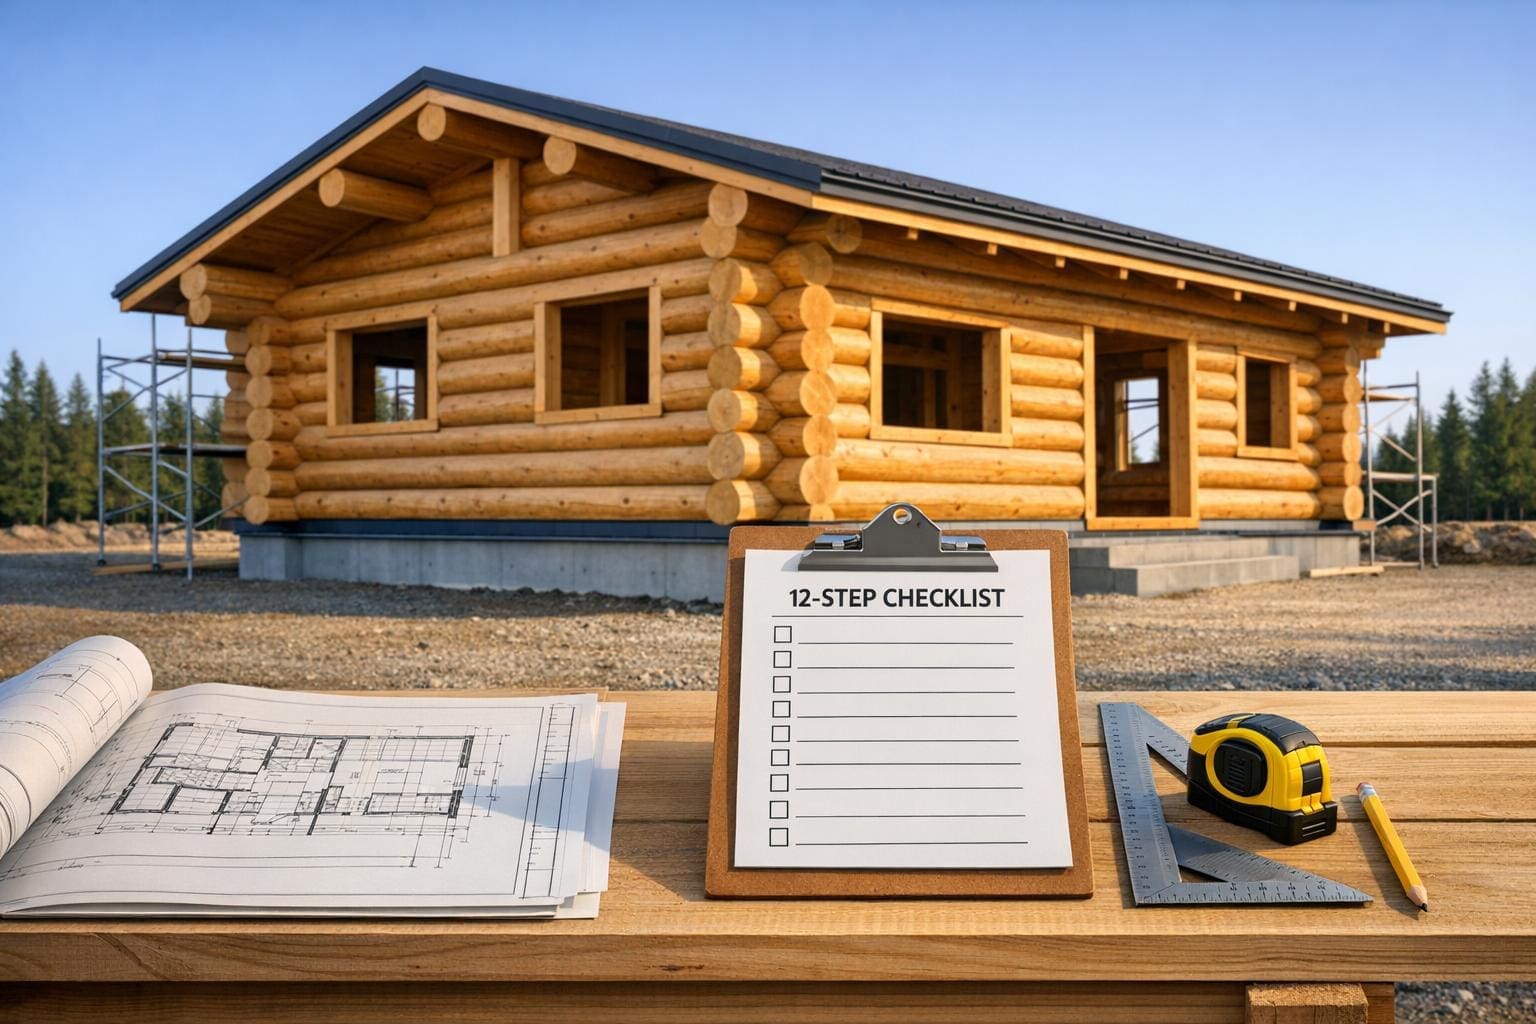
Building a custom log home is a rewarding journey, but it requires careful planning to avoid costly delays and unexpected challenges. Here’s a quick summary of the 12 essential steps to guide your project from idea to completion:
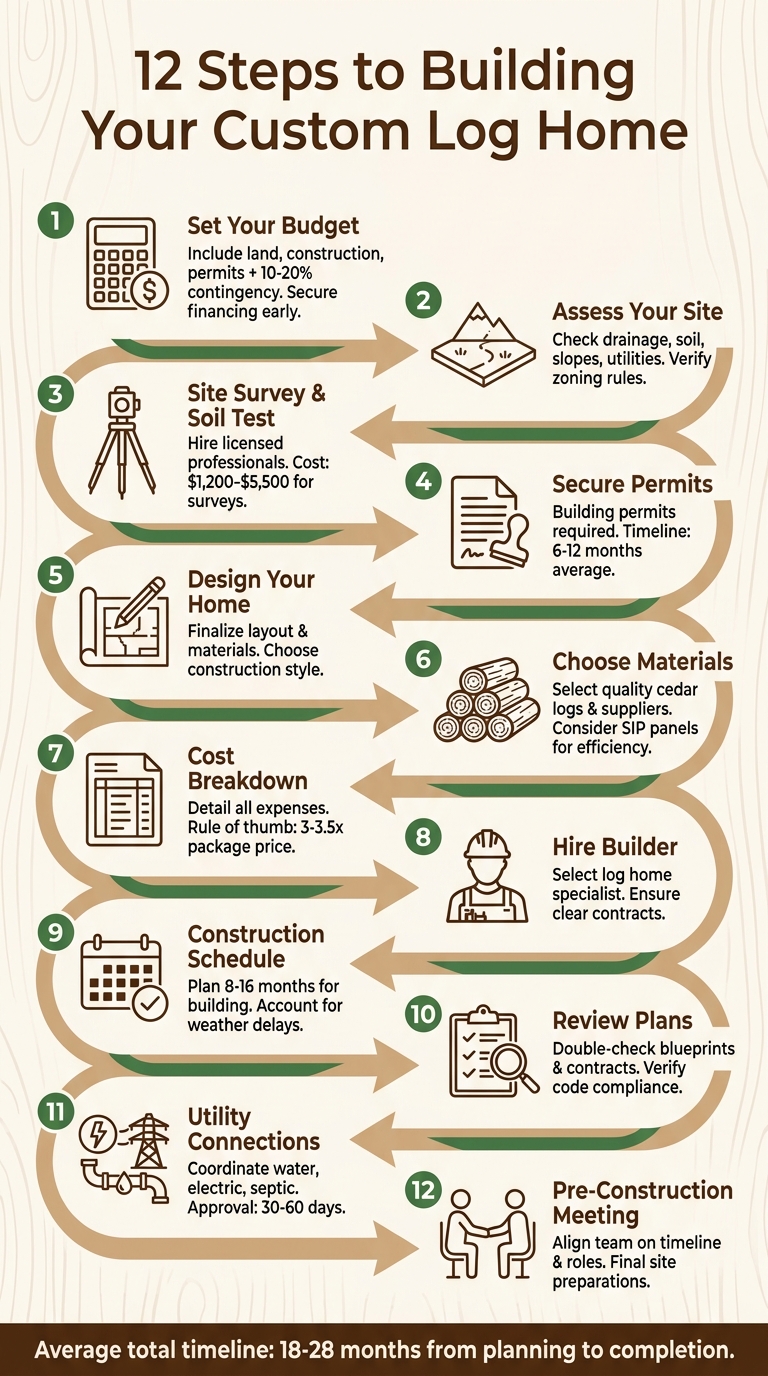
- Set Your Budget: Include all costs – land, construction, permits, and a 10–20% contingency for surprises. Secure financing early.
- Assess Your Site: Evaluate land for drainage, soil stability, slopes, and utility access. Check zoning rules and permits.
- Get a Site Survey and Soil Test: Hire licensed professionals to confirm boundaries, elevations, and soil conditions.
- Secure Permits: Obtain all necessary building permits, which can take weeks to months.
- Design Your Home: Finalize your layout, focusing on functionality, energy efficiency, and materials.
- Choose Materials and Suppliers: Prioritize quality cedar vs. pine logs, SIP panels, and systems that meet local codes.
- Create a Cost Breakdown: Detail every expense, including labor, materials, and utilities. Plan for overruns.
- Hire a Qualified Builder: Select a builder experienced in log homes. Ensure clear contracts and communication.
- Set a Construction Schedule: Plan 8–16 months for building, accounting for weather and subcontractor delays.
- Review Plans and Contracts: Double-check blueprints, agreements, and compliance with local codes.
- Arrange Utility Connections: Coordinate water, electricity, and septic installations early.
- Hold a Pre-Construction Meeting: Align your team on timelines, roles, and final site preparations.
These steps ensure your log home project stays on track, within budget, and aligned with your vision. Each phase builds toward a smooth and efficient construction process.
12 Essential Steps to Build a Custom Log Home
Step 1: Set Your Budget and Get Financing
Laying out your budget is the foundation for every decision you’ll make while building your custom log cabin. Before diving into designs and materials, you need to figure out how much you can realistically spend. Experts agree: start by determining your spending limit, ensuring it covers everything – land, construction, and your dream amenities.
Your budget should account for all major components, including land, site preparation, infrastructure, structural materials, finishes, and professional installations. Don’t forget to include local permits and fees, as these can add up quickly.
It’s smart to secure financing early in the process. Head to your bank to explore construction loan options and establish a spending limit that works for you. Make sure all financing and loan approvals are in place before you start ordering materials or breaking ground.
Set aside an extra 10–20% of your budget as a contingency for unexpected expenses like design changes or site challenges. Walking your plot with a builder or site expert can help you spot potential hidden costs. Review everything included in your log home, SIP, and barndominium packages from Big Twig Homes – such as pre-cut cedar logs, timber components, and specified materials – so you know what you’ll need to source separately. Creating a list of "must-haves" versus "nice-to-haves" will give you the flexibility to adjust if costs climb higher than expected.
Investing in quality cedar and modern insulation can also save you money on energy bills over time. Since now is the perfect time to build, getting these numbers right early ensures a smooth project. Once your financing is squared away, you’re ready to move on to assessing your site in Step 2.
sbb-itb-1086e16
Step 2: Select and Assess Your Building Site
Picking the right property is a critical first step in building your log home. The land you choose must support not only the structure itself but also the essential systems that make your home functional. Before committing to a site, it’s important to dig deeper – literally and figuratively – and evaluate both the physical and legal aspects of the property. A thorough site assessment helps set the stage for a smooth construction process.
Check Site Conditions and Feasibility
Understanding the land’s physical conditions is key to avoiding costly surprises later. Start by walking the property to spot potential issues like poor drainage or unstable soil. Clues such as debris mounds, gullies, bare patches, or vegetation showing stress – like dead grass or leaves – can indicate heavy water runoff [3].
Rocky terrain is another factor to consider. Exposed bedrock could mean additional expenses for blasting to prepare foundations or install utilities like water and sewer lines. If the land includes steep slopes, consult with an excavator or builder to determine the feasibility of your project [3].
Pay close attention to the slope of the site. While flat land might seem easier to work with, it often requires costly drainage solutions, such as French drains or rain gardens. A gentle slope, on the other hand, offers better natural drainage and can be ideal for features like a walkout basement. For this, aim for a slope that allows four to eight feet of foundation wall exposure. Use a level to measure the incline and ensure it fits your plans [3].
If you can, visit the property during different seasons. This helps reveal drainage patterns that might not be obvious during a single visit. Additionally, if a septic system is part of your plan, soil testing is a must to confirm the land can properly handle waste disposal [1].
Verify Utility Access and Zoning Rules
After evaluating the land’s physical characteristics, turn your attention to legal and utility considerations. Start by reviewing the property survey (or plat), which outlines critical details like boundaries, utility easements, and the presence of natural features such as streams or floodplains. If you don’t already have this document, you can usually obtain it from your county or township records office.
"This legal document shows boundaries and corners, as well as pertinent legal information, such as the location of streams, rivers, ponds, floodplains, utility easements and roads." – Jim Cooper, Author and LEED Accredited Professional [3]
Next, determine how utilities will be connected. Will your home tie into municipal water and sewer systems, or will you need to drill a private well and install a septic system? Each option comes with unique costs and permits. Be aware that rocky ground can make utility hookups significantly more expensive if blasting is required to trench for pipes.
Don’t forget to check zoning regulations and setback requirements. These rules dictate how far your home must be from property lines or environmentally sensitive areas. Walking the land with a builder or site expert can help identify potential challenges like tree clearing, grading, or creating road access. Make sure to account for all utility and infrastructure costs in your budget to avoid unexpected expenses later.
Step 3: Get a Professional Site Survey and Soil Test
Once you’ve chosen your site, the next step is to ensure the land is physically ready for construction. This involves hiring licensed professionals for a site survey and soil testing. These steps are essential to protect your investment and avoid future complications.
A professional site survey provides much more than just boundary details. It includes topographic data through contour lines, which show elevation changes at intervals of 2, 5, or 10 feet. These lines help identify the best spots for your foundation and drainage systems. For instance, closely spaced lines indicate steep terrain, while wider spacing suggests gentle slopes – ideal for features like a walkout basement [3].
"If your land has been in your family for years, old survey data could contain misinformation. If so, contact a surveyor and arrange for a boundary survey before proceeding." – Jim Cooper, Author and LEED Accredited Professional [3]
Soil testing, on the other hand, evaluates whether the land can support a septic system and provides insights into drainage and soil stability. It measures the soil’s texture – a balance of sand, silt, and clay – that affects water retention and drainage. Costs for basic soil testing range from $10 to $30, while more detailed tests can cost $30 to $100. If you’re specifically testing for drainage, expect to pay between $20 and $50 [4].
When hiring professionals, always ensure they are licensed and insured. Professional land surveyors typically charge $220 to $450 per hour, and boundary surveys for new construction can range from $1,200 to $5,500 [5]. To save time and money, ask your builder or realtor for referrals, compare at least two to three quotes, and have your property deed ready. You can also find essential resources for log home builders to help streamline your planning process. Keep in mind, only surveys conducted by licensed professionals meet legal requirements for building permits and can help you avoid costly boundary disputes later on [5].
Once your survey and soil analysis are complete, you’ll be ready to move forward with securing permits in the next step.
Step 4: Get Required Permits and Approvals
Once you’ve wrapped up your survey and soil tests, the next step is to secure the necessary building permits. These permits are essential for projects involving new construction, structural modifications, or updates to systems like electrical, HVAC, and plumbing. They ensure your project complies with local building codes and regulations [6].
"Building permits are issued by Municipal Building/Construction Departments and help to ensure that any work done in your municipality conforms with building code and zoning requirements." – Business.NJ.gov [6]
Be prepared for the review process to take some time. Depending on your location, permit approvals can range from a few weeks to several months. On average, the process spans 6–12 months from the initial application to final approval [7]. In some areas, approvals might take as little as 15 days, while others could stretch to nearly 293 days. However, most jurisdictions require at least four weeks for the first review [7][8][10].
Start by reaching out to your local Building Department to find out which forms and codes apply to your project. You’ll likely need to submit engineer-stamped construction plans, a step that can take two to three months. Additional permits, such as those for environmental considerations, well-drilling, or septic systems, may also be required [1][6][7]. If your site includes features like retaining walls or fences, secondary permits might come into play [6].
To keep things running smoothly, schedule inspections at critical points in your project. It’s also a good idea to consult with zoning officials early on to avoid unexpected redesigns. Plan for at least two or three rounds of reviews and revisions, as these are common in the permitting process [6][7][9][10]. Getting your permits in order early helps you stay on schedule and within budget, ensuring your custom log home project moves forward without unnecessary delays.
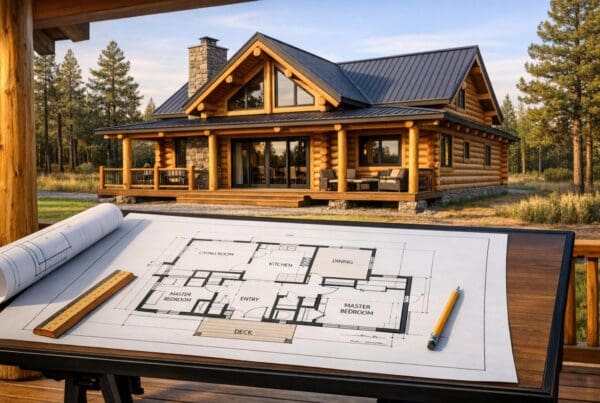
Step 5: Design Your Custom Log Home
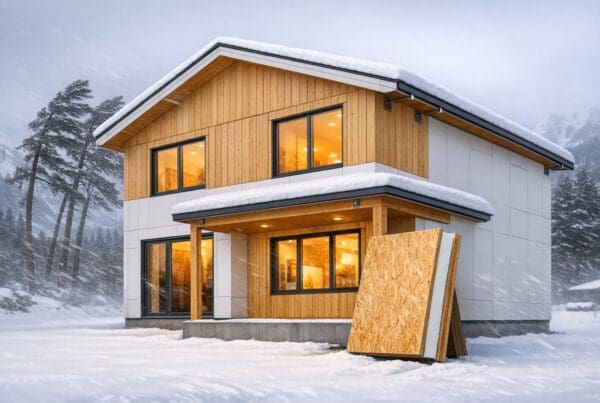
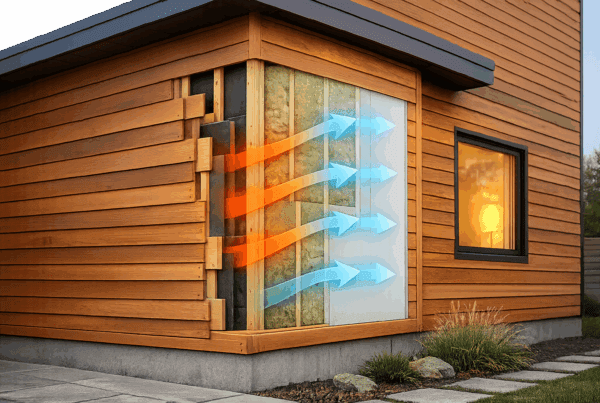
While your permits are being processed, it’s time to focus on crafting a design that aligns with your lifestyle and preferences. Big Twig Homes provides three main construction styles to choose from: traditional Cedar Log Homes, Solid Cedar Homes, and Structural Insulated Panel (SIP) Homes. For instance, SIP construction can lower heating and cooling expenses by as much as 60% [11].
If you’re looking for a balance between aesthetics and practicality, consider a hybrid log home. This approach combines a cedar log exterior with a more conventional interior, reducing both wood usage and labor while maintaining the timeless log home appearance [11].
Collaborate with the experts at Big Twig Homes to refine your floor plan. For example, reducing hallway space can free up more room for living areas, while adding flexible spaces can serve dual purposes, such as home offices, hobby rooms, or guest accommodations [2][12]. Features like higher walls or cathedral ceilings can make spaces feel more open and expansive [12]. Since wood tends to absorb light, incorporating layered lighting can help maintain a bright and welcoming atmosphere [12].
Before locking in your design, take a walk around the building site with a Big Twig Homes expert. This ensures your layout takes advantage of the natural features of the land [1]. To better visualize your plans, request 2D or 3D renderings during the design phase. These tools can help you refine your ideas and make adjustments as needed [2]. You can also integrate energy-efficient options like geothermal heating, solar panels, and SIP panels from EPS Building Systems to reduce energy costs and promote sustainability [11].
For durability and moisture resistance, especially in humid environments, Northern White Cedar from Moosehead Cedar Log Homes is an excellent choice [11]. Most homes built by Big Twig range between 1,200 and 3,000 square feet, with costs averaging $150 to $250 per square foot depending on the materials and level of customization [11]. This is the stage to ensure your home design meets both your current needs and future goals. Once finalized, you’ll move on to selecting the best materials and suppliers in Step 6.
Step 6: Choose Quality Materials and Suppliers
Once your design is finalized, the next step is to carefully select materials and suppliers. The materials you choose will heavily influence your log home’s durability and overall performance. For instance, cedar logs, like the sturdy Northern White Cedar, are a popular choice due to their natural resistance to moisture, rot, and insects. Big Twig Homes collaborates with Moosehead Cedar Log Homes to provide premium cedar logs.
When evaluating suppliers, keep in mind the "Four S’s": Style, Species, Systems, and Shrinkage [13].
- Style: Decide between milled logs, known for their precise uniformity, or handcrafted logs, which offer a more rustic and natural look.
- Species: The type of wood you select impacts your home’s longevity and resilience.
- Systems: This refers to the engineering and joinery techniques used in construction.
- Shrinkage: Wood naturally shrinks as it dries, so understanding this process is crucial. For example, kiln-dried logs dry faster and are less likely to harbor insects.
"When it comes to selecting your log package, it’s the four S’s that rule the school: Style, Species, Systems and Shrinkage." – Log Home Living Editors [13]
For energy efficiency, consider using SIP (Structural Insulated Panels) from EPS Building Systems. These panels, made with EPS or GPS foam cores, are designed to lower energy costs while maintaining structural strength. A reliable supplier will also guide you in selecting the right sealants and fasteners to ensure your walls remain stable and secure.
Before committing to a supplier, make sure their building systems comply with local codes. Check if an engineer’s stamp is required for approval, and request a detailed fastener schedule to confirm that every part of your log system meets precise standards. High-quality suppliers often provide additional maintenance products, like borate-based preservatives and UV-resistant stains, to help protect your home for years to come.
Step 7: Create a Detailed Cost Breakdown
When building a log home, having a thorough cost breakdown is absolutely essential. This means accounting for every single expense – from the log home package itself to site preparation, labor, utilities, and those all-important interior finishes. Without this clarity, it’s easy to lose track and overspend.
Start by reviewing your log home package carefully. Understand exactly what’s included and pinpoint what you’ll need to source separately. Getting this sorted upfront can save you from unexpected surprises later.
"A helpful rule of thumb is that a completed turnkey log home often runs about 3 to 3.5 times the package price." – Ward Cedar Log Homes [14]
For instance, if your log package is priced at $100,000, the total cost to complete the home will likely fall between $300,000 and $350,000 [14]. On average, building a log home costs anywhere from $250 to $400 or more per square foot [14]. This wide range depends on factors like labor costs, site conditions, and the level of finishes you select. It’s worth noting that kitchens, bathrooms, and mechanical systems tend to make up a large portion of the total cost, regardless of the home’s size [14].
Your cost breakdown should cover all major categories, including:
- Site work: Clearing, grading, excavation, and driveway construction.
- Utilities: Well drilling or connecting to town water, septic system installation, and hookup fees.
- Labor and subcontractors: Electrical, plumbing, HVAC, and masonry work.
- Soft costs: Permits, architectural drawings, engineering fees, and site surveys [14][1].
Additionally, it’s smart to include a 10%–15% contingency in your budget. This buffer helps absorb any unexpected price changes or unforeseen expenses, ensuring you stay on track financially.
Once your detailed cost breakdown is complete, you’ll be ready to tackle Step 8: hiring a qualified builder.
Step 8: Hire a Qualified Builder and Crew
Once you’ve nailed down your cost breakdown, it’s time to focus on finding the right builder. This decision is a big one. Building a log home isn’t the same as constructing a traditional house – it requires specialized skills. Your builder needs to understand the unique aspects of log construction, like how to manage settling, handle moisture, and execute proper joinery techniques. They should also be familiar with cedar log homes and energy-efficient systems.
"Are you working with a builder who understands log homes?" – Ward Cedar Log Homes [1]
If you’re unsure where to start, Big Twig Homes is a great resource for finding builders experienced in cedar log construction. A good builder will take the time to walk your property with you before construction begins. This allows them to spot potential issues, such as drainage problems, and determine the best placement for your home. They can also identify site-specific challenges early on [1]. Additionally, they’ll review your log home package to clarify what’s included and what might need to be sourced separately [1].
It’s critical to establish clear communication from the start. Make sure you have a written contract that outlines everything – whether the quote is for a basic shell or a fully finished home. The contract should also detail the timeline, payment schedule, and how unexpected changes will be handled. Involving your builder early in the process can help refine your design and keep costs under control [2].
"Find a builder who can see your vision, and make sure they can stick to your budget." – Jeff Parmeter, Client Advisor, Golden Eagle Log and Timber Homes [2]
Finally, confirm that your builder is well-versed in local building codes and permit requirements. This knowledge is crucial for avoiding delays or compliance issues. They should also be ready to coordinate with subcontractors for things like electrical, plumbing, and HVAC systems. Regular updates and transparency throughout the process are signs of a builder you can trust. With the right builder, you’ll set the foundation – not just for your home, but for a seamless construction experience.
Step 9: Build a Realistic Construction Schedule
Once you’ve tackled the earlier planning stages, creating a realistic construction schedule becomes the next critical step. For a custom log home, the construction phase typically takes 8–16 months, though more elaborate luxury designs can stretch up to 24 months. Add to that the pre-construction phase – which includes budgeting, finalizing log home plans, choosing materials, and securing permits – and you’re looking at an average of 12 months. Under ideal conditions, the absolute fastest timeline for building is about six months [7] [15].
Jim Cooper puts it this way:
"Construction scheduling is part art and part science. Building a strong relationship with your builder and setting a realistic schedule are crucial." [15]
Start by identifying the crucial tasks that must happen in sequence. For instance, you can’t pour foundation walls until the footings are in place, and subfloor installation has to wait until the foundation is finished. To visualize these dependencies, a Gantt chart can be incredibly helpful. It allows you to map out the critical steps alongside less time-sensitive tasks like HVAC installation, gutters, or septic systems.
Once you’ve mapped out the key steps, factor in external elements that might impact your timeline. For example, site preparation is quicker in dry weather but slows significantly in poor conditions. A good rule of thumb is to add a buffer of 1–2 days for every 5 days of work. On top of that, plan for potential delays of 2–4 weeks due to subcontractor or supplier issues. One way to keep things moving is to finalize material selections – like cabinets, countertops, and flooring – well in advance [7] [15].
Jim Cooper offers another important piece of advice:
"Unanticipated changes may not only double the time required for building, they also may double the cost." [15]
To avoid these pitfalls, lock in your design before breaking ground. Changes midway through construction can wreak havoc on both your timeline and your budget. Structuring your contractor payment schedule around specific milestones is another way to keep the project on track. And don’t underestimate the importance of regular communication with your builder – it can help you address delays before they escalate into bigger problems.
Step 10: Review Plans, Contracts, and Paperwork
Before breaking ground, take the time to carefully review all documents. This step is about more than just formalities – it’s your chance to catch potential problems before they turn into costly mistakes. Start by revisiting your blueprints. Make sure the floor plan aligns with your lifestyle, considering room layouts, built-in storage, and how traffic will flow through the space [1][2].
Next, confirm that your plans comply with local building codes. Check details like load-bearing wall placements, egress window requirements, and zoning setbacks. Also, ensure the design maximizes your lot’s natural advantages, such as sunlight, privacy, and views [1][2]. As Jeff Parmeter from Golden Eagle Log and Timber Homes explains:
This process takes time, but every step along the way is worth it when your blueprint becomes a reality [2].
If you have 2D or 3D renderings, refine them until they perfectly capture your vision [2].
Contracts: Clarity and Precision Are Key
When reviewing contracts with builders, suppliers, and subcontractors, focus on precision. The scope of work should match the proposal exactly, detailing what’s included, what’s excluded, and who’s responsible for what [16][17][18]. Double-check that the dates on the blueprints referenced in the contract align with your most recent plans to avoid any miscommunication [16]. Dawn Killough, a Contract Administrator, highlights the importance of this:
A well-defined scope description helps all parties to the contract know exactly what work is included – as well as excluded [16].
Payment terms and change order procedures are just as important. Review the invoice schedule and ensure payment triggers are tied to specific milestones. Clarify when retainage (withheld funds) will be released [17]. Define who has the authority to make changes, what documentation is needed, and how those changes will impact costs and timelines [16][17]. Be cautious of clauses like "no-lien" waivers, which could strip you of payment protection rights, and "pay-if-paid" terms, which shift the risk of non-payment onto you [16].
Permits and Final Preparations
Before construction starts, confirm that all necessary permits and approvals are in place. This includes building permits, driveway permits (which establish an address for deliveries), and site-specific approvals like septic system soil tests [1][2]. Ensure your financing is fully secured, and make sure all local fees are factored into your budget. Every detail, from interior finishes to exterior stain colors, should be finalized and documented [2].
Once everything is reviewed and confirmed, you’ll be ready to arrange utility connections and move forward with construction.
Step 11: Arrange Utility Connections
Getting your utilities sorted out before laying the foundation is a smart way to keep your construction timeline on track and avoid unnecessary delays. Start by figuring out whether your property will connect to municipal water and sewer systems or if you’ll need a private well and septic system. Walk the site with your builder or a site expert to determine the best paths for utility lines and identify any challenges specific to your property [1].
It’s important to reach out to utility providers early in the process. Approval times can range from 30 to 60 days, depending on your location [19]. You’ll likely need to provide signed engineering plans, layouts for service lines, meter sizing details, and a formal letter confirming the feasibility of the connection [19]. If you’re installing a septic system, make sure a soil test is completed and that all underground utility lines are inspected and approved before backfilling trenches [20].
To save both time and money, coordinate the excavation for electric, water, sewer, and fiber-optic lines. This approach reduces trenching costs and minimizes disruption to your landscaping later. In some areas, telephone lines can share a trench with electrical lines, provided they’re separated by at least 10 inches of well-packed dirt [20]. As Log Cabin Connection puts it:
By installing utilities ahead of time you’ll make your cabin building process a lot easier. After all, you still need the same things during construction as you will when you move in. [20]
Don’t forget to set up temporary power and water. A temporary power pole with weatherproof GFCI outlets can supply electricity for construction tools, while a temporary hose bibb will come in handy for tasks like mixing concrete and cleaning equipment. Use heavy-duty #10 or #12 extension cords for longer runs to avoid voltage drops and tripped breakers [20].
Be sure to include utility hookup costs in your budget as a separate line item, and double-check that your plans meet local regulations [1]. It’s also a good idea to schedule a pre-submittal meeting with utility providers to address any potential issues, such as incorrect connection elevations or outdated details, before finalizing your designs [19]. Once utilities are in place, you’ll be ready to move on to Step 12 and your pre-construction meeting.
Step 12: Conduct a Pre-Construction Meeting
Before breaking ground, gather your key team members for a pre-construction meeting. This is your last chance to ensure everyone is on the same page about the project scope, timeline, and critical details. Be sure to include your builder or general contractor, log home package provider, design team, site surveyor, and subcontractors responsible for HVAC, plumbing, and electrical work.
With utilities in place, focus on the finer details. Start by walking the site with your builder to finalize your home’s placement. Check for optimal natural light, confirm which trees need clearing, verify grading and drainage plans, and ensure driveway permits and site access for delivery trucks are ready.
"The builder can take a look at the log home floor plan and make suggestions for customizations so you can stay within budget."
- Jeff Parmeter, Client Advisor at Golden Eagle Log and Timber Homes [2]
Pay special attention to moisture protection. Make sure the foundation provides at least an 18-inch clearance to prevent rain splash-back on the cedar logs, which could lead to expensive moisture damage later. If you’re using a slab-on-grade foundation that doesn’t allow for this clearance, discuss alternatives like pressure-treated logs for the first course or adding a gravel border around the perimeter to reduce mud and water exposure [21]. As noted by LogHome.com:
"The first course of logs must be absolutely square, level and sealed weathertight to the foundation before you proceed."
[21]
Next, review the sealing process and roof installation timeline. Go over your sealing systems – such as foam tape, caulking, chinking, and metal flashing – and confirm that all materials are on-site. Ensure foam tape is properly applied between log courses. Additionally, plan for roof installation to begin immediately after framing, as this is one of the best ways to protect your home from weather damage [2].
Wrap things up by confirming the final details of your log home package and any locally sourced materials. Establish a contingency plan for unexpected changes, and set clear expectations about the construction sequence. Make sure subcontractors understand how their work will align with the log framing process. As Ward Cedar Log Homes highlights:
"Better preparation leads to smoother construction."
[1]
Conclusion
Building a custom log home is a fulfilling journey, but it requires careful planning to avoid unexpected delays, overspending, and timeline hiccups. By following this 12-step checklist, you can help ensure your project stays on track from start to finish.
"The more prepared you are before building, the smoother things tend to go."
- Ward Cedar Log Homes [1]
Each step – whether it’s setting your budget, evaluating your site, selecting materials, or holding pre-construction meetings – lays the groundwork for a successful project. Working with experts can help refine your design, prioritize what’s most important, and streamline the entire build process. While the planning phase may take several months, this effort pays off by keeping construction efficient and focused once it begins [2].
This guide pulls together all the practical advice you need for a smooth building experience. At Big Twig Homes, we’re here to support you every step of the way. From offering high-quality cedar log home packages to providing expert advice, we aim to help you make informed decisions. Whether it’s customizing your design or selecting the right materials, we’re dedicated to turning your dream home into a reality.
"This process takes time, but every step along the way is worth it when your blueprint becomes a reality."
- Golden Eagle Log and Timber Homes [2]
FAQs
What costs do people most often forget to budget for?
When planning a construction project, it’s easy to miss several hidden costs that can significantly impact your budget. Expenses like land preparation – which might include tree clearing, grading, or creating driveway access – often catch people off guard. Similarly, utility connections, whether you’re drilling a well or connecting to town water, can add up quickly.
Don’t forget about soil testing, which is essential for determining if the land is suitable for building. On top of that, interior finishes, permits, and other site-specific requirements are frequently underestimated. Accounting for these details from the start can help you build a more accurate budget and avoid unpleasant surprises down the line.
How do I know if my land can support a septic system?
To figure out if your land is suitable for a septic system, the first step is a perc test. This test measures how well the soil can absorb wastewater. If the soil doesn’t absorb properly, it could lead to system issues down the line.
Beyond the soil test, make sure to review local regulations, secure the necessary permits, and confirm that your property complies with setback requirements. A licensed septic installer can help interpret the soil test results and conduct a site evaluation to guide you through the process.
When should I order my log package and major materials?
It’s a smart move to order your log package and key materials well before your construction begins. Plan for about 12 months from the initial stages of planning to the first delivery. This timeline allows for finalizing the design, securing necessary permits, and managing ordering logistics. By locking in your plans and permits early, and staying in sync with your supplier, you can avoid delays and ensure everything arrives right when you need it for construction.